& Tools")


The House of Hope is one of the most memorable locations in Baldur’s Gate 3. Players become aware of this location and the devil Raphael midway through Act 1, and in Act 3 the party gets an opportunity to sneak in while the master is away.
The only reason to visit the House of Hope is to try and nullify a deal made with Raphael, or else to get his Orphic Hammer without having to sign a deal. Either way, players will need to navigate this unusual location and then beat one of the toughest bosses in all of Baldur’s Gate 3.
7:09
Baldur’s Gate 3: How To Save The Hag Victims
Players can save all the Hag’s victims in Baldur’s Gate 3 by sparing plenty of effort.
Updated on April 15, 2024, by Nahda Nabiilah: Exploring the House of Hope in Baldur’s Gate 3 will reward players with precious loot like the Amulet of Greater Health, Gauntlets of Hill Giant Strength, Helldusk Gloves, and Helldusk Armor. Moreover, if Tav bypasses Raphael’s Vault Inert Infernal Gem Wisdom check (10) and Infernal Control Gem Arcana check (20), they can collect Helldusk Helmet, 666 Gold, Staff of Willpower, and Mol’s contract. Delivering the latter to Mol can ensure the little Tiefling’s safety and provide the opportunity to tell Mol how dangerous selling one’s soul to a devil.
How to Enter the House of Hope


As players navigate Act 3, they may hear that Gortash stole the Crown of Karsus directly from the vaults of Mephistopheles, one of the Archdevils of Hell. This means there’s a Diabolist in Baldur’s Gate capable of sneaking into the personal domains of devils.
This Diabolist is Helsik, the dwarf who runs a shop called the Devil’s Fee. This shop is on the north side of the Lower City, just southwest of the graveyard and west of the Forge of the Nine. She has a fairly good selection of items on sale, but players can interact with the items she has on display to roll Arcana checks. By passing two checks, the party will realize Helsik is more than just a dabbler and confront her about it. This opens up an even better selection of store items. Speak to her one more time to ask her about getting into the House of Hope. However, if players are playing a Dark Urge run, they will automatically learn from the Diabolist herself that she previously helped them enter the devil’s den.
Helsik will open the way for the party, but only for the staggering price of 20,000 gold. Players can pay it out, or they can try an Intimidation roll against 20 to cut the price to 10,000 gold. A Persuasion check against 20 will convince her to waive the fee entirely, but in exchange, players must find and give her the Gauntlets of Hill Giant Strength, which also sits in the House of Hope.
Players can also avoid this fee by pickpocketing the Grimoire Bound in Imp Skin from Helsik. All the items the party needs to open the portal are in the rooms and chests upstairs, and the Grimoire will explain where to place them on the blood circle.
To get past the fireball trap, give a bottle of water to the Thirsty Ward, the golden mask at the top of the stairs. The party can also Misty Step or jump up to the balconies on every side of the building. The only downside to this approach is that the Helsik will give the party a set of instructions that are much clearer than the Grimoire and a bag with all the needed items if players convince her to help.
To open the portal, players must do the following:
- Place a skull on the arrow pointing at the altar (west).
- Going clockwise, place the Coin of Mammon on the next point along the edge of the circle.
- Skip the next point, then place a diamond on the point after (east by northeast).
- On the next point clockwise from the diamond, place some incense.
- Finally, place the Infernal Marble in the center of the circle.
Players will know that the right item is on the right spot because it’ll light up with infernal flame. Once all five items are where they should be, a Portal to the House of Hope will open.
2:42

Baldur’s Gate 3: How To Enter Burrow Holes And Crevices
Players that want to explore the spaces beyond burrow holes and crevices in Baldur’s Gate 3 can learn how to enter those areas here.
Meeting Hope
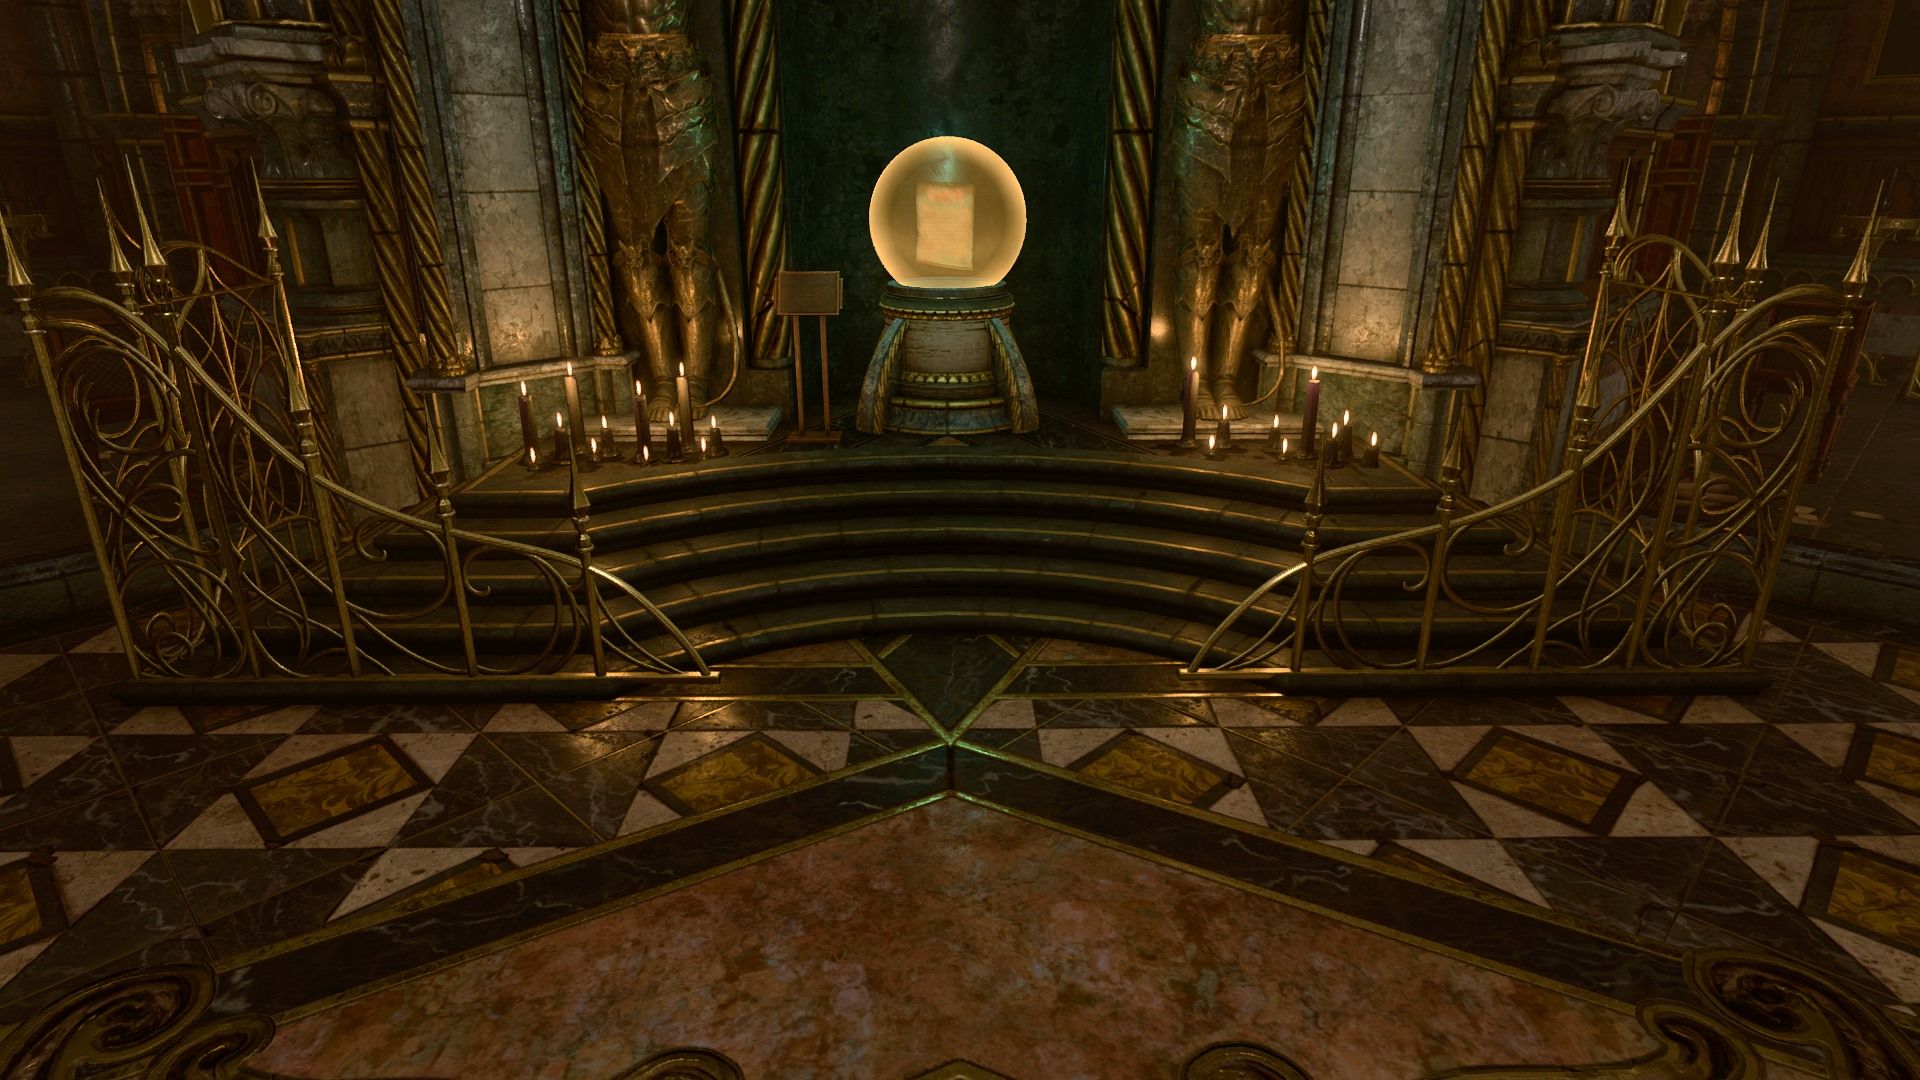
When players arrive at the House of Hope, they’ll meet a glowing orange projection who calls herself Hope. This is apparently the person Raphael named his sanctuary after, and he’s been trying and failing to break her spirit for some time.
Hope can be incredibly helpful as players explore the House of Hope, both by explaining what to do and by showing up as a follower for the boss encounter, at least if the party frees her. However, to get this assistance, a party member must pass an Intelligence, Charisma, or Wisdom check against a DC of 10. If players fail, Hope’s jailors will yank her back and prevent her from explaining as much as she can.
During her first appearance, Hope will explain the best order to do things: find the key, take the contract (or the hammer), and finally break her chains. First, however, players should visit the Archive.
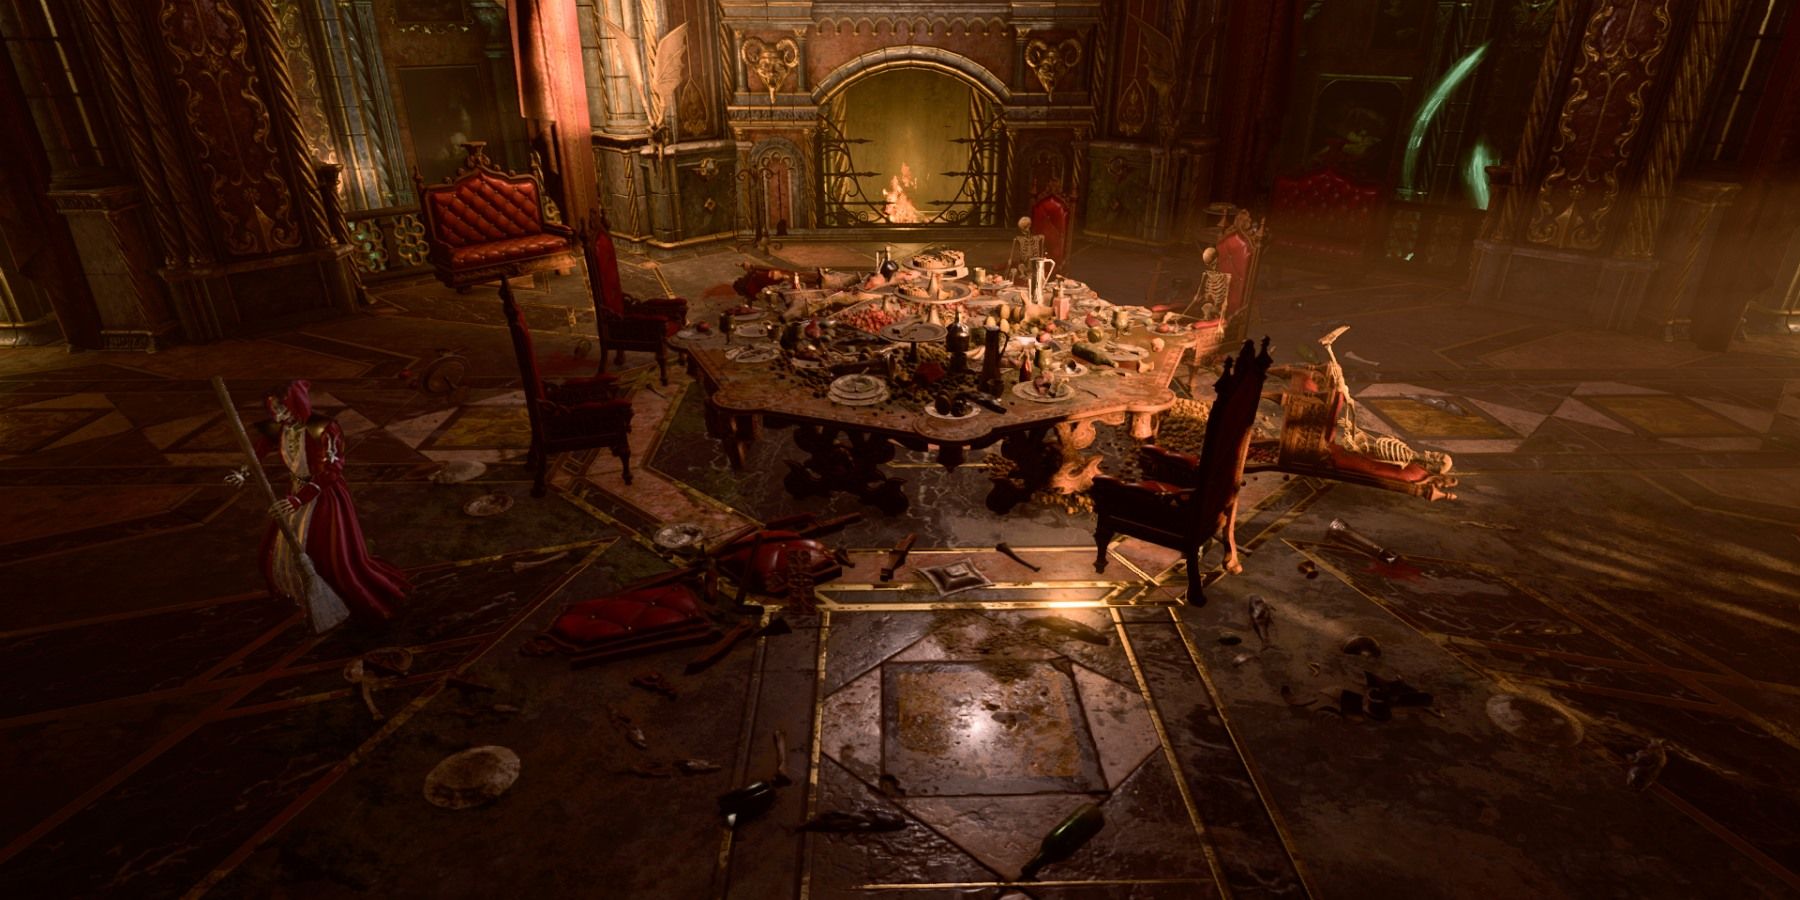
Just past Hope is a central banquet hall, with a table covered in rotting food. The door to the left is locked, and while the party can pick it open, there’s no need to do so at the moment. Raphael is away, and the residents of the House of Hope aren’t hostile yet. Instead, open the right door and start exploring. Be sure to loot every chest in the halls, because none of them are forbidden.
4:23
Baldur’s Gate 3: What To Do With Owlbear Egg (& How To Get It)
Players that have questions about the uses for the Owlbear Egg in Baldur’s Gate 3 can find the answers that they seek in this guide.
The Rooms of the House of Hope
Moving counterclockwise from the open door, the first room players will find is full of portals. These portals only work for Raphael, and so the party can only look through them. A gnome named Nubaldin is cleaning the room, and he’ll mention knowing Gortash back when he was a kid. This room has no objectives or loot, so move on quickly.
Past the room is a small balcony with a broken railing, and the party can jump from here to a series of stones that lead up to the boudoir and down to the prison. More on these locations later.
At the north end of the hallway is the front entrance to the boudoir, but a Mystic Force Curtain will block access until the party can get an invitation. Right across from the boudoir is a set of stairs that lead up to a blocked archway. The party must pass a Perception check to identify an Inert Infernal Gem, a Wisdom check against 10 to activate the gem, and finally an Arcana check against 20 to use the gem and open the secret door.
Behind the door is a treasure hoard. The main hoard includes 666 gold and the Helldusk Helmet. A pillar to the right holds the Staff of Spellpower, and the pillar to the left holds Mol’s Contract. Mol apparently needed Raphael’s help to escape the Shadow-Cursed Lands, and the party can free the Tiefling of any obligation by stealing this contract and bringing it back to Mol, who currently lives in the Guild’s headquarters.
4:23
Baldur’s Gate 3: What To Do With Owlbear Egg (& How To Get It)
Players that have questions about the uses for the Owlbear Egg in Baldur’s Gate 3 can find the answers that they seek in this guide.
The last door on the west side of the hall is the Archive, which is where Hope expects the party to go next. Before speaking to her, be sure to pull the lever on the opposite wall to open the door that leads to the banquet hall.
To get more information from Hope, players must now pass a 15 Charisma, Intelligence, or Wisdom check. By passing, she’ll explain that the Archivist has the invitation players need to enter the boudoir. Players can then try a Persuasion check to get a name they can use to cow the Archivist more easily.
If players get the name, they can try a Deception check against a 15 to convince the Archivist that they’re a fiendish bureaucrat here to assess Raphael. This will get the party the boudoir invitation immediately. A party member can also attempt a Detect Thoughts check to get the name, and by asking about the contract (or hammer) players can make an Intimidation, Persuasion, or Deception check against a 25 to get the invitation.
If all else fails, the party can attack or pickpocket the Archivist to get the invitation, or they can use the back route by jumping across the stones from the northeast balcony. Even a character with 8 Strength can perform the needed jumps.
4:36

Baldur’s Gate 3: How To Use The Rune Of The Wolf
The Rune of the Wolf leads players to the secret vault of the druids in Baldur’s Gate 3. Here’s how and where to use it.
What Awaits in the Boudoir

Raphael isn’t in the boudoir, but someone who looks exactly like him is lying in his bed. This is Haarlep, an incubus who has taken Raphael’s appearance to be his perfect lover. Players can indulge Haarlep to get a key to Raphael’s safe, or they can refuse. If they refuse, Haarlep will attack and summon six Vengeful Imps to assist them. Once down, players can acquire the Key to open Raphael’s Safe.
After the fight, be sure to use the Restoration Faucets by the boudoir’s pool. These faucets will restore every spell slot, ability, and hit point characters may have lost. The only thing it doesn’t do is restore short rest uses. The boudoir also has several chests with valuable items inside.
To the left of the bed is a painting of Raphael wielding flames, and under it is a conspicuous button. Disarm the painting first (if possible), then press the button to reveal a safe. Haarlep’s key will open the safe, and inside is a note with the magic words that will let the party access the contract or Orphic Hammer, and the Helldusk Gloves.
10:35


Baldur’s Gate 3: How To Kill Balthazar
In this guide, players will learn how to kill Balthazar in Baldur’s Gate 3 in two ways.
How to Free Hope
Head back to the Archive and use the magic words to either rip up the contract or steal the Orphic Hammer. The Archivist will warn the player that Raphael is mad and coming home, but he won’t stop the party. On the other hand, all the other House of Hope residents have all turned hostile. They’ll try to run up to the party and explode, causing Fire damage and becoming a Vengeful monster of some type.
At this point, players should clear out the items in the Archive. This includes the Gloves of Hill Giant Strength Helsik wanted and an Amulet of Greater Health. These items set Strength and Constitution to 23, making them well worth picking up. Stealing these items earlier would have angered the Archivist, but it no longer matters, since the House has turned hostile. The party can also get several gems and potions from the display cases.
As players cross the House of Hope, two enemies to watch for are the Hell Spheres. These are elementals that deal incredible amounts of Fire damage to anyone nearby. They take reduced damage from weapons, Acid, Lightning, and Radiant, and they take no damage from Necrotic, Fire, Psychic, and Poison. However, they’re very slow, so spells like Ray of Frost and Repelling Blast can keep them at bay indefinitely.
Players can reach Hope’s prison by using a hatch on the east side of the House, or by using the exterior rocks again and entering the glowing green passageway. Either way, the party will need to face two Spectators and six Vengeful Imps to free Hope. Players should avoid sending party members into the chamber, because the Vengeful Imps have Repelling Blast and can knock characters into chasms. Instead, let the enemies approach the party and attack them from range.
With the enemies down, players can equip a party member with the Orphic Hammer and have them attack the two glowing rocks, keeping Hope in place. At this point, Hope will become a party follower. She’s a level 10 Life Domain Cleric, making her a great party healer.
7:14

Baldur’s Gate 3: Should You Free Orpheus?
Orpheus’ fate can have a major impact on the conclusion of Baldur’s Gate 3. Here’s what happens if players decide to free him or keep him locked up.
How to Beat Raphael

When players try to exit the portal in the foyer, it’ll close and Raphael will appear. This happens even if players didn’t take a detour to get Hope. The Devil is accompanied by Hope’s sister, eight Cambions, and if players did anything with Yurgir (kill him, convince him to kill himself, complete his contract), the demon will also be present. However, players can convince Yurgir to take their side with a Persuasion check against 30.
Yurgir won’t contribute much to the fight on either side. Mostly he attacks with a Thunderwave effect or by stabbing with his dagger, then turns invisible and runs away. Still, it’s better for him to help the party with his tactics than Raphael, and if players speak to him after the fight, he’ll become an ally for the “Gather Your Allies” quest.
Raphael himself had several gimmicks during this fight.
- Raphael has 666 hit points (naturally).
- Unlike every other boss in the game, Raphael sings his own boss theme.
- Raphael can siphon power from the four Pillars of Souls in the foyer. He can then use this power to cast immensely strong fire spells. Players should prepare for this with Fire Resistance Elixirs and by destroying the pillars.
- The four pillars are immune to Necrotic, Fire, Psychic, and Poison damage, but they take double damage from Force and Bludgeoning. A character equipped with the Orphic Hammer can make short work of the pillars, as can spells like Disintegrate and Eldritch Blast.
- The pillars have no hit points before the battle begins, so players can’t destroy them ahead of time.
- Destroying a pillar applies the condition Soul Overcharge on Raphael. He can’t use his soul to cast spells until he uses the Ascended Fiend to power up.
- Raphael can use the ability Ascended Fiend to power up for several rounds, but he must remain in his normal form for several rounds before he can use it again.
- After siphoning soul charges, Raphael gets a special reaction called Punish Divinity. If a character hits him with Radiant damage, he can stun them, deal damage, and hit them with a special condition called Severed Soul.
- A character with the Severed Soul condition has disadvantages in all attack rolls and ability checks until the next long rest, or until the character can use the special action Restore Soul on a Soul Pillar or on Raphael. This action appears in the Common section and uses the Remove Curse icon.
- Raphael’s soul spells can be Counterspelled.
If players destroy every Soul Pillar in the room, Raphael will eventually run out of abilities and have nothing left aside from a basic multi attack. He’ll still probably have a few hundred hit points left, but with Hope on healing duties, players should have no more trouble finishing him off. The party can then get the Helldusk Armor from his body.
13:21
Baldur’s Gate 3: Disable The Steel Watch Walkthrough & Foundry Location
Follow this guide to find out where the Steel Watch Foundry is in BG3, and how to shut down Gortash’s mechanized army in one fell swoop.
If Hope survives the fight, she promises to rededicate the House of Hope and make it a place where people can actually find hope and relief from the evils of Avernus. The party will also get the Gloves of Soul Catching, which gives the wearer 1d10 Force damage on unarmed attacks, +2 Constitution, and either +10 hit points or advantage on attack rolls and saving throws each round after an unarmed attack.
The portal back to the Devil’s Fee will open again at this point, and players can now enter and exit the House of Hope whenever they like. Helsik will want the Gauntlets if players promise to get them, but she’ll back off if the party passes a DC 10 Intimidation check.